Android - Multitouch Tutorial
Multi-touch gesture happens when more then one finger touches the screen at the same time. Android allows us to detect these gestures.
Android system generates the following touch events whenever multiple fingers touches the screen at the same time.
| Sr.No | Event & description |
|---|---|
| 1 | ACTION_DOWN
For the first pointer that touches the screen. This starts the gesture.
|
| 2 | ACTION_POINTER_DOWN
For extra pointers that enter the screen beyond the first.
|
| 3 | ACTION_MOVE
A change has happened during a press gesture.
|
| 4 | ACTION_POINTER_UP
Sent when a non-primary pointer goes up.
|
| 5 | ACTION_UP
Sent when the last pointer leaves the screen.
|
So in order to detect any of the above mention event , you need to overrideonTouchEvent() method and check these events manually. Its syntax is given below −
public boolean onTouchEvent(MotionEvent ev){
final int actionPeformed = ev.getAction();
switch(actionPeformed){
   case MotionEvent.ACTION_DOWN:{
      break;
   }

   case MotionEvent.ACTION_MOVE:{
      break;
   }
   return true;
}
In these cases, you can perform any calculation you like. For example zooming , shrinking e.t.c. In order to get the co-ordinates of the X and Y axis, you can call getX() and getY() method. Its syntax is given below:
final float x = ev.getX();
final float y = ev.getY();
Apart from these methods, there are other methods provided by this MotionEvent class for better dealing with multitouch. These methods are listed below:
| Sr.No | Method & description |
|---|---|
| 1 | getAction()
This method returns the kind of action being performed
|
| 2 | getPressure()
This method returns the current pressure of this event for the first index
|
| 3 | getRawX()
This method returns the original raw X coordinate of this event
|
| 4 | getRawY()
This method returns the original raw Y coordinate of this event
|
| 5 | getSize()
This method returns the size for the first pointer index
|
| 6 | getSource()
This method gets the source of the event
|
| 7 | getXPrecision()
This method return the precision of the X coordinates being reported
|
| 8 | getYPrecision()
This method return the precision of the Y coordinates being reported
|
Example
Here is an example demonstrating the use of Multitouch. It creates a basic Multitouch gesture application that allows you to view the co-ordinates when multitouch is performed.
To experiment with this example , you need to run this on an actual device.
| Steps | Description |
|---|---|
| 1 | You will use android studio to create an Android application under a package com.example.sairamkrishna.myapplication.multitouch. While creating this project, make sure you Target SDK and Compile With at the latest version of Android SDK to use higher levels of APIs. |
| 2 | Modify src/MainActivity.java file to add multitouch code. |
| 3 | Modify the res/layout/activity_main to add respective XML components. |
| 4 | Run the application and choose a running android device and install the application on it and verify the results. |
Following is the content of the modified main activity filesrc/MainActivity.java.
package com.example.sairamkrishna.myapplication;

import android.app.Activity;
import android.os.Bundle;
import android.view.Menu;
import android.view.MenuItem;
import android.view.MotionEvent;
import android.view.View;
import android.widget.EditText;
import android.widget.TextView;
import java.util.Set;

public class MainActivity extends Activity {
   float xAxis = 0f;
   float yAxis = 0f;

   float lastXAxis = 0f;
   float lastYAxis = 0f;

   EditText ed1, ed2, ed3, ed4;
   TextView tv1;

   @Override
   protected void onCreate(Bundle savedInstanceState) {
      super.onCreate(savedInstanceState);
      setContentView(R.layout.activity_main);

      ed1 = (EditText) findViewById(R.id.editText);
      ed2 = (EditText) findViewById(R.id.editText2);
      ed3 = (EditText) findViewById(R.id.editText3);
      ed4 = (EditText) findViewById(R.id.editText4);

      tv1=(TextView)findViewById(R.id.textView2);
      tv1.setOnTouchListener(new View.OnTouchListener() {
         @Override
         public boolean onTouch(View v, MotionEvent event) {
            final int actionPeformed = event.getAction();

            switch(actionPeformed){
               case MotionEvent.ACTION_DOWN:{
                  final float x = event.getX();
                  final float y = event.getY();

                  lastXAxis = x;
                  lastYAxis = y;

                  ed1.setText(Float.toString(lastXAxis));
                  ed2.setText(Float.toString(lastYAxis));
                  break;
               }

               case MotionEvent.ACTION_MOVE:{
                  final float x = event.getX();
                  final float y = event.getY();

                  final float dx = x - lastXAxis;
                  final float dy = y - lastYAxis;

                  xAxis += dx;
                  yAxis += dy;

                  ed3.setText(Float.toString(xAxis));
                  ed4.setText(Float.toString(yAxis));
                  break;
               }
            }
            return true;
         }
      });
   }

   @Override
   public boolean onCreateOptionsMenu(Menu menu) {
      // Inflate the menu; this adds items to the action bar if it is present.
      getMenuInflater().inflate(R.menu.menu_main, menu);
      return true;
   }

   @Override
   public boolean onOptionsItemSelected(MenuItem item) {
      // Handle action bar item clicks here. The action bar will
      // automatically handle clicks on the Home/Up button, so long
      // as you specify a parent activity in AndroidManifest.xml.

      int id = item.getItemId();

      //noinspection SimplifiableIfStatement
      if (id == R.id.action_settings) {
         return true;
      }
      return super.onOptionsItemSelected(item);
   }
}
Following is the modified content of the xml res/layout/activity_main.xml.
<RelativeLayout xmlns:android="http://schemas.android.com/apk/res/android"
   xmlns:tools="http://schemas.android.com/tools" android:layout_width="match_parent"
   android:layout_height="match_parent" android:paddingLeft="@dimen/activity_horizontal_margin"
   android:paddingRight="@dimen/activity_horizontal_margin"
   android:paddingTop="@dimen/activity_vertical_margin"
   android:paddingBottom="@dimen/activity_vertical_margin"
   tools:context=".MainActivity"
   android:transitionGroup="true">

   <TextView android:text="Multitouch example" android:layout_width="wrap_content"
      android:layout_height="wrap_content"
      android:id="@+id/textview"
      android:textSize="35dp"
      android:layout_alignParentTop="true"
      android:layout_centerHorizontal="true" />

   <TextView
      android:layout_width="wrap_content"
      android:layout_height="wrap_content"
      android:text="Tutorials point"
      android:id="@+id/textView"
      android:layout_below="@+id/textview"
      android:layout_centerHorizontal="true"
      android:textColor="#ff7aff24"
      android:textSize="35dp" />

   <ImageView
      android:layout_width="wrap_content"
      android:layout_height="wrap_content"
      android:id="@+id/imageView"
      android:src="@drawable/abc"
      android:layout_below="@+id/textView"
      android:layout_centerHorizontal="true"
      android:theme="@style/Base.TextAppearance.AppCompat" />

   <EditText
      android:layout_width="wrap_content"
      android:layout_height="wrap_content"
      android:id="@+id/editText"
      android:layout_below="@+id/imageView"
      android:layout_alignRight="@+id/textview"
      android:layout_alignEnd="@+id/textview"
      android:hint="X-Axis"
      android:layout_alignLeft="@+id/textview"
      android:layout_alignStart="@+id/textview"
      android:textColorHint="#ff69ff0e" />

   <EditText
      android:layout_width="wrap_content"
      android:layout_height="wrap_content"
      android:id="@+id/editText2"
      android:layout_below="@+id/editText"
      android:layout_alignLeft="@+id/editText"
      android:layout_alignStart="@+id/editText"
      android:textColorHint="#ff21ff11"
      android:hint="Y-Axis"
      android:layout_alignRight="@+id/editText"
      android:layout_alignEnd="@+id/editText" />

   <EditText
      android:layout_width="wrap_content"
      android:layout_height="wrap_content"
      android:id="@+id/editText3"
      android:layout_below="@+id/editText2"
      android:layout_alignLeft="@+id/editText2"
      android:layout_alignStart="@+id/editText2"
      android:hint="Move X"
      android:textColorHint="#ff33ff20"
      android:layout_alignRight="@+id/editText2"
      android:layout_alignEnd="@+id/editText2" />

   <EditText
      android:layout_width="wrap_content"
      android:layout_height="wrap_content"
      android:id="@+id/editText4"
      android:layout_below="@+id/editText3"
      android:layout_alignLeft="@+id/editText3"
      android:layout_alignStart="@+id/editText3"
      android:textColorHint="#ff31ff07"
      android:hint="Move Y"
      android:layout_alignRight="@+id/editText3"
      android:layout_alignEnd="@+id/editText3" />

   <TextView
      android:layout_width="wrap_content"
      android:layout_height="wrap_content"
      android:text="Touch here"
      android:id="@+id/textView2"
      android:layout_alignParentBottom="true"
      android:layout_alignLeft="@+id/imageView"
      android:layout_alignStart="@+id/imageView"
      android:focusable="true"
      android:typeface="sans"
      android:clickable="true"
      android:textColor="#ff5480ff"
      android:textSize="35dp" />

</RelativeLayout>
Following is the content of the res/values/string.xml.
<resources>
   <string name="app_name">My Application</string>
   <string name="hello_world">Hello world!</string>
   <string name="action_settings">Settings</string>
</resources>
Following is the content of AndroidManifest.xml file.
<?xml version="1.0" encoding="utf-8"?>
<manifest xmlns:android="http://schemas.android.com/apk/res/android"
   package="com.example.sairamkrishna.myapplication" >

   <application
      android:allowBackup="true"
      android:icon="@mipmap/ic_launcher"
      android:label="@string/app_name"
      android:theme="@style/AppTheme" >

      <activity
         android:name=".MainActivity"
         android:label="@string/app_name" >

         <intent-filter>
            <action android:name="android.intent.action.MAIN" />
            <category android:name="android.intent.category.LAUNCHER" />
         </intent-filter>

      </activity>

   </application>
</manifest>
Let's try to run your application. I assume you have connected your actual Android Mobile device with your computer. To run the app from android studio, open one of your project's activity files and click Run  icon from the toolbar. Before starting your application, Android studio will display following window to select an option where you want to run your Android application.
 icon from the toolbar. Before starting your application, Android studio will display following window to select an option where you want to run your Android application.
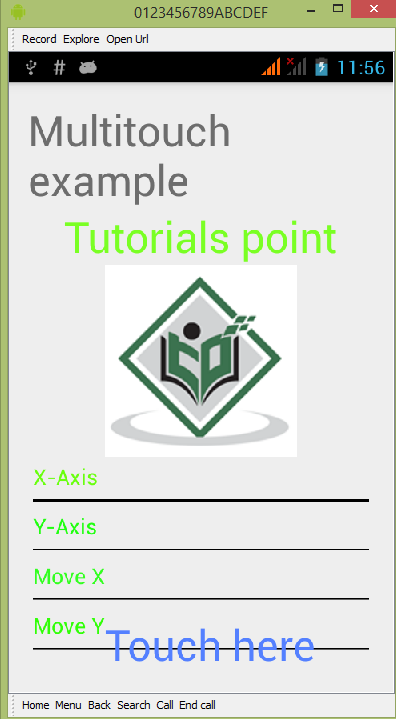
Select your mobile device as an option and then check your mobile device which will display your default screen −

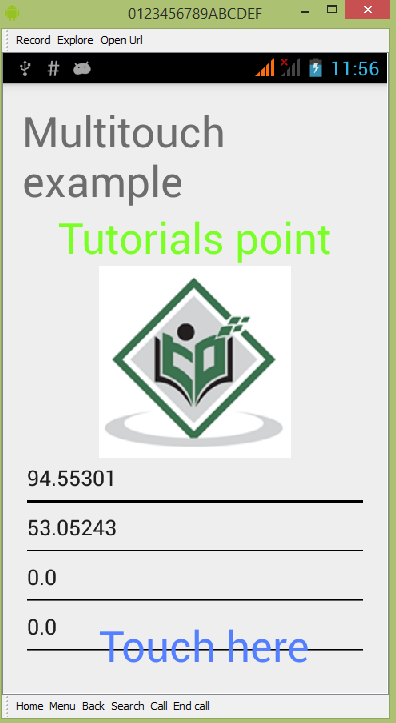
By default you will see nothing in any field. Now just tap on the Touch here area and see some data in the fields. It is shown below −

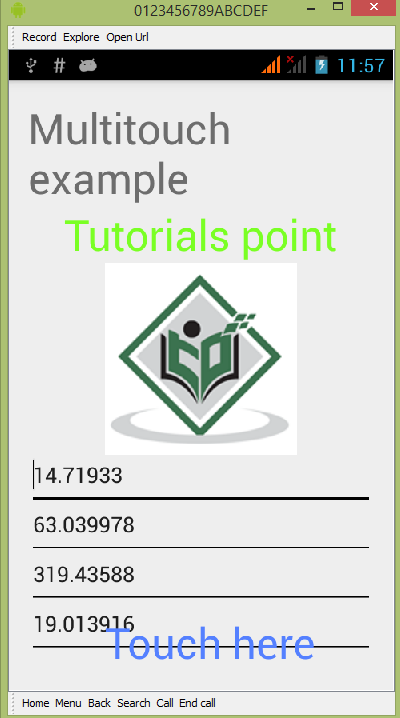
You will see that the data in the Move field is 0 , because only a single touch gesture has been performed. Now tap on the screen and start dragging your finger. You will see the change in the data of the move field. It is shown below −

Comments
Post a Comment