Android - Session Management Tutorial
Session help you when want to store user data outside your application, so that when the next time user use your application, you can easily get back his details and perform accordingly.
This can be done in many ways. But the most easiest and nicest way of doing this is through Shared Preferences.
Shared Preferences
Shared Preferences allow you to save and retrieve data in the form of key,value pair. In order to use shared preferences , you have to call a method getSharedPreferences() that returns a SharedPreference instance pointing to the file that contains the values of preferences.
SharedPreferences sharedpreferences = getSharedPreferences(MyPREFERENCES, Context.MODE_PRIVATE);
You can save something in the sharedpreferences by using SharedPreferences.Editor class. You will call the edit method of SharedPreference instance and will receive it in an editor object. Its syntax is −
Editor editor = sharedpreferences.edit();
editor.putString("key", "value");
editor.commit();
Apart from the putString method, there are methods available in the editor class that allows manipulation of data inside shared preferences. They are listed as follows −
| Sr.No | Mode and description |
|---|---|
| 1 | apply()
It is an abstract method. It will commit your changes back from editor to the sharedPreference object you are calling
|
| 2 | clear()
It will remove all values from the editor
|
| 3 | remove(String key)
It will remove the value whose key has been passed as a parameter
|
| 4 | putLong(String key, long value)
It will save a long value in a preference editor
|
| 5 | putInt(String key, int value)
It will save a integer value in a preference editor
|
| 6 | putFloat(String key, float value)
It will save a float value in a preference editor
|
Session Management through Shared Preferences
In order to perform session management from shared preferences , we need to check the values or data stored in shared preferences in the onResumemethod. If we don't have the data, we will start the application from the beginning as it is newly installed. But if we got the data, we will start from the where the user left it. It is demonstrated in the example below:
Example
The below example demonstrates the use of Session Management. It crates a basic application that allows you to login for the first time. And then when you exit the application without logging out, you will be brought back to the same place if you start the application again. But if you logout from the application, you will be brought back to the main login screen.
To experiment with this example , you need to run this on an actual device or in an emulator .
| Steps | Description |
|---|---|
| 1 | You will use android studio IDE to create an Android application under a package com.example.sairamkrishna.myapplication;. While creating this project, make sure you Target SDK and Compile With at the latest version of Android SDK to use higher levels of APIs. |
| 2 | Modify src/MainActivity.java file to add progress code to add session code. |
| 3 | Create New Activity and it name as second.java.Edit this file to add progress code to add session code. |
| 4 | Modify res/layout/activity_main.xml file to add respective XML code. |
| 5 | Modify res/layout/second_main.xml file to add respective XML code. |
| 7 | Run the application and choose a running android device and install the application on it and verify the results. |
Here is the content of MainActivity.java.
package com.example.sairamkrishna.myapplication;

import android.content.Context;
import android.content.Intent;
import android.content.SharedPreferences;
import android.support.v7.app.ActionBarActivity;
import android.os.Bundle;
import android.view.Menu;
import android.view.MenuItem;
import android.view.View;
import android.widget.Button;
import android.widget.EditText;
import android.widget.Toast;

public class MainActivity extends ActionBarActivity {
   EditText ed1,ed2,ed3;
   Button b1;
   Intent in;

   public static final String MyPREFERENCES = "MyPrefs" ;
   public static final String Name = "nameKey";
   public static final String Phone = "phoneKey";
   public static final String Email = "emailKey";
   SharedPreferences sharedpreferences;

   @Override
   protected void onCreate(Bundle savedInstanceState) {
      super.onCreate(savedInstanceState);
      setContentView(R.layout.activity_main);

      ed1=(EditText)findViewById(R.id.editText);
      ed2=(EditText)findViewById(R.id.editText2);
      ed3=(EditText)findViewById(R.id.editText3);

      b1=(Button)findViewById(R.id.button);
      sharedpreferences = getSharedPreferences(MyPREFERENCES, Context.MODE_PRIVATE);

      b1.setOnClickListener(new View.OnClickListener() {
         @Override
         public void onClick(View v) {
            String n  = ed1.getText().toString();
            String ph  = ed2.getText().toString();
            String e  = ed3.getText().toString();

            SharedPreferences.Editor editor = sharedpreferences.edit();

            editor.putString(Name, n);
            editor.putString(Phone, ph);
            editor.putString(Email, e);
            editor.commit();

            in = new Intent(MainActivity.this,second.class);
            startActivity(in);
         }
      });
   }

   @Override
   public boolean onCreateOptionsMenu(Menu menu) {
      // Inflate the menu; this adds items to the action bar if it is present.
      getMenuInflater().inflate(R.menu.menu_main, menu);
      return true;
   }

   @Override
   public boolean onOptionsItemSelected(MenuItem item) {
      // Handle action bar item clicks here. The action bar will
      // automatically handle clicks on the Home/Up button, so long
      // as you specify a parent activity in AndroidManifest.xml.

      int id = item.getItemId();

      //noinspection SimplifiableIfStatement
      if (id == R.id.action_settings) {
         return true;
      }
      return super.onOptionsItemSelected(item);
   }
}
Here is the content of second_main.java.
package com.example.sairamkrishna.myapplication;

import android.app.Activity;
import android.content.Context;
import android.content.SharedPreferences;
import android.os.Bundle;
import android.view.View;
import android.widget.Button;

import static com.example.sairamkrishna.myapplication.R.id.button3;

/**
 * Created by Sairamkrishna on 4/7/2015.
 */
public class second extends Activity {
   Button bu=null;
   Button bu2=null;

   @Override
   protected void onCreate(Bundle savedInstanceState) {
      super.onCreate(savedInstanceState);
      setContentView(R.layout.second_main);

      bu=(Button)findViewById(R.id.button2);
      bu2=(Button)findViewById(R.id.button3);
   }

   public  void logout(View view){
      SharedPreferences sharedpreferences = getSharedPreferences(MainActivity.MyPREFERENCES, Context.MODE_PRIVATE);
      SharedPreferences.Editor editor = sharedpreferences.edit();
      editor.clear();
      editor.commit();
   }

   public void close(View view){
      finish();
   }
}
Here is the content of activity_main.xml.
<RelativeLayout xmlns:android="http://schemas.android.com/apk/res/android"
   xmlns:tools="http://schemas.android.com/tools" android:layout_width="match_parent"
   android:layout_height="match_parent" android:paddingLeft="@dimen/activity_horizontal_margin"
   android:paddingRight="@dimen/activity_horizontal_margin"
   android:paddingTop="@dimen/activity_vertical_margin"
   android:paddingBottom="@dimen/activity_vertical_margin" tools:context=".MainActivity">

   <TextView
      android:layout_width="wrap_content"
      android:layout_height="wrap_content"
      android:text="Shared Preference"
      android:id="@+id/textView"
      android:layout_alignParentTop="true"
      android:layout_centerHorizontal="true"
      android:textSize="35dp" />

   <TextView
      android:layout_width="wrap_content"
      android:layout_height="wrap_content"
      android:text="Tutorials Point"
      android:id="@+id/textView2"
      android:layout_below="@+id/textView"
      android:layout_centerHorizontal="true"
      android:textSize="35dp"
      android:textColor="#ff16ff01" />

   <EditText
      android:layout_width="wrap_content"
      android:layout_height="wrap_content"
      android:id="@+id/editText"
      android:layout_below="@+id/textView2"
      android:layout_marginTop="67dp"
      android:hint="Name"
      android:layout_alignParentRight="true"
      android:layout_alignParentEnd="true"
      android:layout_alignParentLeft="true"
      android:layout_alignParentStart="true" />

   <EditText
      android:layout_width="wrap_content"
      android:layout_height="wrap_content"
      android:id="@+id/editText2"
      android:layout_below="@+id/editText"
      android:layout_alignParentLeft="true"
      android:layout_alignParentStart="true"
      android:layout_alignParentRight="true"
      android:layout_alignParentEnd="true"
      android:hint="Pass" />

   <EditText
      android:layout_width="wrap_content"
      android:layout_height="wrap_content"
      android:id="@+id/editText3"
      android:layout_below="@+id/editText2"
      android:layout_alignParentLeft="true"
      android:layout_alignParentStart="true"
      android:layout_alignParentRight="true"
      android:layout_alignParentEnd="true"
      android:hint="Email" />

   <Button
      android:layout_width="wrap_content"
      android:layout_height="wrap_content"
      android:text="login"
      android:id="@+id/button"
      android:layout_below="@+id/editText3"
      android:layout_centerHorizontal="true"
      android:layout_marginTop="50dp" />

</RelativeLayout>
Here is the content of activity_welcome.xml.
<?xml version="1.0" encoding="utf-8"?>
<RelativeLayout xmlns:android="http://schemas.android.com/apk/res/android"
   android:orientation="vertical" android:layout_width="match_parent"
   android:layout_height="match_parent">

   <Button
      android:layout_width="wrap_content"
      android:layout_height="wrap_content"
      android:text="Logout"
      android:onClick="logout"
      android:id="@+id/button2"
      android:layout_gravity="center_horizontal"
      android:layout_alignParentTop="true"
      android:layout_centerHorizontal="true"
      android:layout_marginTop="191dp" />

   <Button
      android:layout_width="wrap_content"
      android:layout_height="wrap_content"
      android:text="Close"
      android:onClick="close"
      android:id="@+id/button3"
      android:layout_below="@+id/button2"
      android:layout_centerHorizontal="true"
      android:layout_marginTop="69dp" />

</RelativeLayout>
Here is the content of Strings.xml.
<resources>
   <string name="app_name">My Application</string>
   <string name="hello_world">Hello world!</string>
   <string name="action_settings">Settings</string>
</resources>
Here is the content of AndroidManifest.xml.
<?xml version="1.0" encoding="utf-8"?>
<manifest xmlns:android="http://schemas.android.com/apk/res/android"
   package="com.example.sairamkrishna.myapplication" >

   <application
      android:allowBackup="true"
      android:icon="@mipmap/ic_launcher"
      android:label="@string/app_name"
      android:theme="@style/AppTheme" >

      <activity
         android:name=".MainActivity"
         android:label="@string/app_name" >

         <intent-filter>
            <action android:name="android.intent.action.MAIN" />
            <category android:name="android.intent.category.LAUNCHER" />
         </intent-filter>

      </activity>

      <activity android:name=".second"></activity>

   </application>
</manifest>
Let's try to run your application. I assume you had created your AVD while doing environment setup. To run the app from Android studio, open one of your project's activity files and click Run  icon from the tool bar. Android studio installs the app on your AVD and starts it and if everything is fine with your set-up and application, it will display following Emulator window −
icon from the tool bar. Android studio installs the app on your AVD and starts it and if everything is fine with your set-up and application, it will display following Emulator window −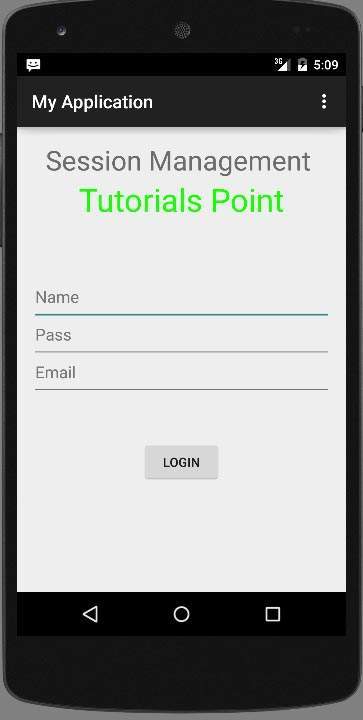
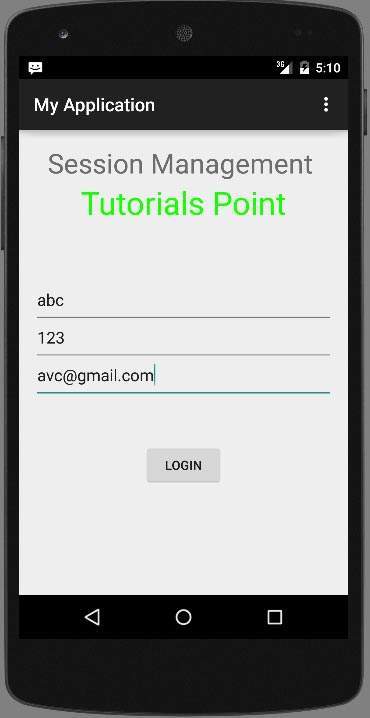
Type in your username and password (type anything you like, but remember what you type), and click on login button. It is shown in the image below −
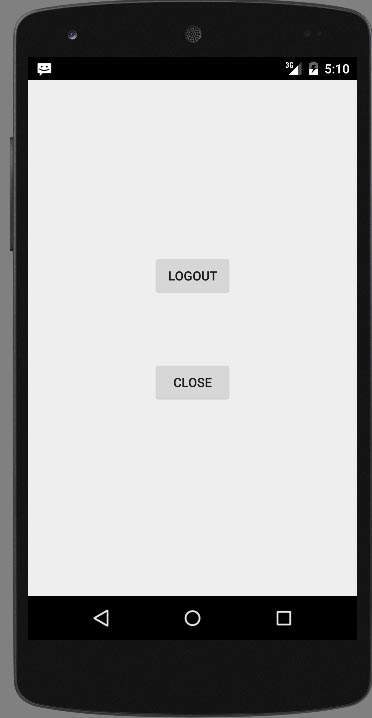
As soon as you click on login button, you will be brought to this Welcome screen. Now your login information is stored in shared preferences.
Now click on Exit without logout button and you will be brought back to the home screen and in preference file out put would be as shown below image
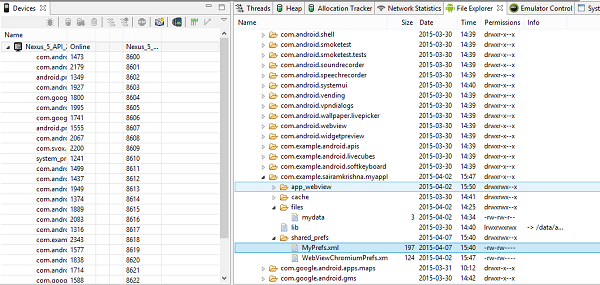
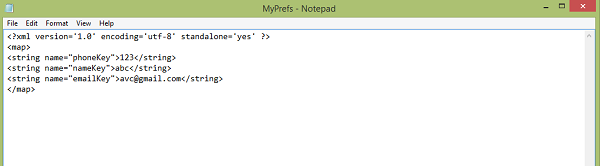
If you open myPref.xml file as note file, it would be as follows
If you click on logout button, it will erase preference values. and if you entered different values as inputs,it will enter those values as preference in XML


Comments
Post a Comment